Sunday, April 29, 2012

Brunch!


We're big fans of brunch; so much so that The Captain jokes that we worship at the Church of Saint Benedict.  What's not to like about brunch - lazy breakfast with multiple options, some alcoholic beverage usually included, then a slow slide right into lunch fare and the desert table finale.  One of our local spots has the Chocolate Fountain of Goodness - sort of a throw-back to the tacky 80s, but not gonna lie, love strawberries that have been under that fountain!

This morning we had The Captain's brother and his wife for brunch.  Since my SIL is a fan of the brunch buffet, I decided to have some fun with it and create a buffet experience for her.  I spread out the food on our bar and made little tents to identify everything.  Sadly,  no Fountain of Goodness!


The egg strata is an easy brunch dish - assemble it  the night before and just bake in the morning.  Recipe from Smitten Kitchen and available here.  It's easy and versatile - I've added mushrooms, peppers and topped with tomato slices.  You can add sausage, bacon, or ham (or all three if you really like the salted pork products!) and switch out the cheeses to what you have on hand or like.


I saw the waffle cookies - Boot Tracks-  on Huffington Post.   Yummy little chocolate bites with a hint of coffee.

And a totally non-brunch-related photo of little spring bouquets from our gardens.  Hsappy  Mimosa-in-your-cup  Sunday!


Thursday, April 26, 2012

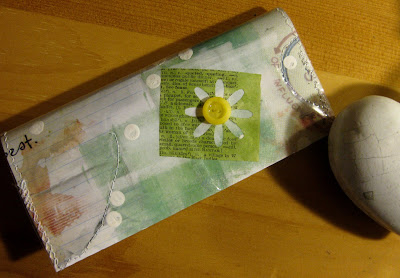
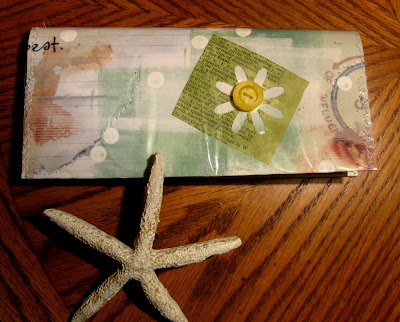
Checkbook Cover


Back in LBDC (life before debit cards), I was pretty fussy about my checks and checkbook cover.  Since I I hardly ever write checks anymore, my checkbook lives a lonely life in the bottom of my bag and looks like it - tattered pages, torn cover - not a pretty sight to haul out in public. It was in serious need of an intervention.

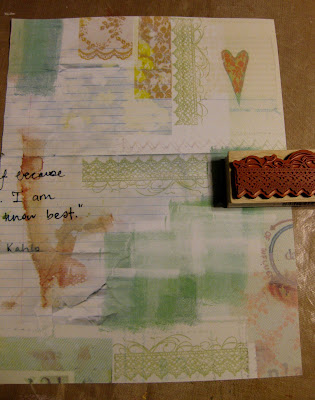
Check out this artist paper in the latest issue of Somerset Studio:


I always forget the "before" picture.  I randomly stamped the green lace-y trim.


Then added some eraser-dots.  This is the easiest was to make small dots - dip a new pencil eraser in acrylic paint and dot away!  I sprayed a leftover piece of text page with Tattered Angels spray and punched out the flower.  I cut the paper to fit my checkbook and folded the edges to make flaps to hold the checkbook inside. 

Now to make the cover more durable - enter the pillow case bag dug out of my supply of saved bags:


I cut the bag to fit my paper cover ( with a little overhang to be trimmed after sewing) and clipped it to the right side of the cover to stabilize it for sewing.  Note the professional sewing clips!


I zig-zag stitched the two together, then flipped the top and bottom folds to the inside and zig-zagged them to make the pockets to hold the checkbook. 


 I added some free-form stitching to stabilize the paper and plastic sandwich. 


I love my new zero-cost cover!  Now my checkbook can sashay out in public with pride.


Saturday, April 21, 2012

Spring Has Sprung!


Even though we had a mild winter, New Englanders are still very happy to welcome spring.  Everything is turning green, flowers are blossoming, and perennials are making their reappearance.  It was sunny and in the 70s  today - a perfect day to work outside.


Our sandy front slope is finally filling in.  Violets are taking over, and the vinca is finally spreading.


One reason I love Lady's Mantle - those deep leaves hold drops of water.


Basket of Gold

Flowering Quince


Bleeding Heart


Circle of peas with lettuce in the center.  By the time the peas get tall enough to shade the lettuce, we'll have eaten it all.  At least that's the plan.

Marsh Marigolds in our swampy back 40.


   Skunk cabbages really love having wet feet.  I know they're weeds, but what a great shot of green before much else is growing back there.

The flamingos make me laugh every time I see them. They know they are not allowed in the front yard !


Sunday, April 15, 2012

No Foo-Foo Card


I needed a card for a male friend who just turned sixty.  Call me crazy, but I think a birthday card should make you feel better, not worse.  It should add to the enjoyment of the day, not make you feel like you are three steps away from The Home.

But I'm a bit nervous about making cards for men.  There was one spectacular failure - a card made for my very special uncle that involved the da Vinci  man, a strategically placed ruler sticker  (so I wouldn't embarrass an elderly gentleman) and this quote,  " you measure up in every way".  As I was putting it into the envelope it hit me that the  picture + ruler + message = a bit risque!

I'd kept this insert from some Tim Holtz Grungepaper - loved the colors and swirls.  Turns out it made the perfect background for my card.  I added in a strip of text, and yes, some ruler sticker !


Then a great stamp from River City Rubberworks.  I love this distinguished guy! I embossed him with fine embossing powder so the ink wouldn't smudge on the glossy background.   And because I did want to acknowledge the importance of the "zero" birthday, I added some Aged Photo Distress ink to a small tag and stamped the numbers.  I attached it to with a brad and added in a couple of die cuts.


Easy, quick, masculine  - mission accomplished! 

Friday, April 6, 2012

LL Bean Knock-Off


This LL Bean wreath would be perfect for our front door, but the $60.00 price tag made me think I could make a reasonable knock-off.


Here are the supplies I used  - a wreath from Joanne's (under $5.00 with my 40% off coupon), some shells from my collection, and a piece of ribbon from my stash.  The sea stars aren't real, but look close enough and don't get me in trouble with Marine Biology daughter! 

I loosely glued on the ribbon, then added in the shells and some faux white flowers.  Here is my version - perfect for spring and summer and continuing the beachy theme in our house. 


Speaking of projects, there's an exciting link party over at A2Z featuring all kinds of fantastic projects like furniture refinishing, paper arts, cooking, and many other  creative projects.   I love Beth's  blog, even when there's not a party there.   She is wildly creative and wickedly funny. 

Sunday, April 1, 2012

Christmas Clipboards


I'm trying to keep up with the  "12 Months of Christmas" project.  I didn't quite make the end of the month deadline (the month being March), but April 1st is close enough, right?


I make Christmas gifts for The Captain's office staff and this year started early with decorated clipboards.  I found these 6x8 inch clipboards at the Dollar Store.  I like this smaller size - just right for holding lists, coupons or notes to kids and husbands.


To start, I made a template so cutting out the papers would be quick.  Well, it should be quick, but I am the world's worst precision measurer and cutter.  After three tries, I finally got one that fit! 

Since the theme color for March was green, I searched my stash of papers for something green.  I cut a coordinating strip of green for the first one and punched out some holes with a paper punch.  Then rubbed inside the circles with an embossing pen and embossed with holes with white embossing powder.  I glued the strip onto the background paper.  A few fabric flowers added some texture and interest.


The clipboards are very shiny, so I used a sanding block to rough it up a bit so the glue would have something to grip.  I used a satin finish ModPodge to glue the background paper to the clipboard. After applying the glue I used an old credit card to press out all the air bubbles.  Don't skip this step!  After letting the board air-dry for a couple of hours, I painted on a layer of ModPdoge over the papered clipboard to protect the paper.


My friend Shiela gave me some Smooch Inks that I used to color the leaves and bird on the board stamped with the chair.  These are slow-drying pearlescent inks that come with a little brush, like a nail polish brush but much finer, so coloring small areas or lines is pretty easy.  There's a cool tutorial here.

Lessons from the first three:

Glue down the background first, then add embellishments or collaged papers.  It's hard to   
swipe  the credit card over 3D embellishments!

Thicker scrapbook papers are easier to work with than thin text pages.  The text pages have more tendency to wrinkle.  Workable, but more work.

After applying the top coat of ModPodge, don't panic if there are bubbles.  Let it dry and as long as the paper was glued down tight to begin with, it miraculously dries flat.  I've messed with it in the past, trying to smooth out the wrinkles after the top coat and just made it worse.  The text paper one was all bubbly and dried nice and flat.

These are fun - like making really big tags.  Three down, 25 to go!

Normal Title Italic

Follow Me on Pinterest

LinkWithin

Related Posts Plugin for WordPress, Blogger...
 
SITE DESIGN BY DESIGNER BLOGS