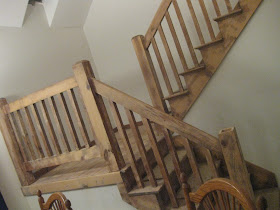
My plan is to paint the stairs, but because the stairs are heavily varnished I'm concerned about making sure the paint will stick. I don't need to sand off all the varnish, but at least scrub it up enough to give the paint something to grip. Armed with my trusty little mouse sander, glasses and a face mask, let the sanding commence!
This was very slow-going - my poor little mouse wasn't built for such a big job! Time to drag out the small circular sander which worked much better on larger areas. One complaint - the little bag that's supposed to trap the dust is really mostly decorative!
Welcome to the East Coast Dust Bowl. It is unbelievable how far the dust travels and how it clings to everything. Once the stairs are done, I'm going to be doing some serious dusting!
It took several passes to get through the layers of varnish and at this point, things were definitely looking pretty shabby!
Sanding the spindles was a bear! I tried hand-sanding them, but since I wanted to finish the stairs this decade, I needed a faster way. Then I remembered my mouse sander had a small attachment that fit between the spindles. It still took hours, but it saved my hands and did a much better job.
Just in case the sanding wasn't enough (and because I live to complexify every project), I wiped down every square inch of stairs with a chemical sander. This is really a weak version of a stripper, so I wore gloves. There wasn't much odor, but I opened the windows for extra ventilation. I'm sure the chemical sander wouldn't be enough on its own, even though the label makes it sound like it would. I just wanted some extra gripping power! It dried to a whitish finish which can be painted over.
Next step - filling a bazillion holes. I know you're giddy with anticipation!


No comments:
Post a Comment