Showing posts with label washi tape. Show all posts

Saturday, October 8, 2016

Pumpkins Going Postal


Continuing my efforts to push the limits of the postal system,  I mailed pumpkins to the Grands.


My first idea was to use those little pumpkin buckets for hauling candy loot, but the opening is huge.  I found these carvable pumpkins, and the expert in all things pumpkin at the craft store assured me there would be plenty of room inside for treats.


The Captain helped with cutting off the tops.  While these little guys are carvable, they are not easily carvable, and it took some extra muscle and hand strength to cut off the cap.


But look at all the room inside !   I was able to fit in trucks for the boys and a full-size jar of Wilton fall cookie decorations for Montana granddaughter with plenty of room for extra goodies.


I lined the pumpkins with some tissue paper from my stash and then tucked in goodies - chocolate eyeballs, blinky rings,


pumpkin tattoos,  M&Ms, bead bracelet kit and chocolate ghosts.


I used some plastic decorative tape to hold it all together.   I wouldn't trust paper washi tape to hold stick,  but the plastic tape held securely.   I did use packing tape to hold on the labels.


And here they are at the Post Office.   It's no secret that I love our Post Office clerks - they always comment on my packaging and didn't even blink at my latest mailing adventure.   I do wish they didn't have to slap those honking stickers all over, but they always try to avoid covering artwork, so can't really complain.


And here they are in Texas with some very happy little guys.   I FaceTimed Montana granddaughter who was busy munching on eyeballs , so hers also made it OK.

This is so much fun!!

Friday, December 11, 2015

Altered Journal Project


{here}


I've just finished altering eight journals from my stash - totally from my stash.  Sometimes the amount of stuff I have even astonishes me !    These are in the "less is more" category.   I opted for a simpler style that might appeal more to folks who aren't excessives.  Don't you love that term, "excessives" - I first saw it used by the talented Tish at  A Femme d'un Certain  Age.    I abandoned my no-success-like-excess approach for this project.

To start - this unusual journal is from my friend, Shiela - and yes, auto-correct, that's how she spells it.  The journal was made by Heather Carter,  a Texas artist who now specializes in wonderful wooden sculptures, but in the late 90s made handmade journals.  I found one on eBay - a parallelogram shaped journal, same paper as mine,  for $60.00!   This triangle shaped journal was fun to work with and a bit of a challenge.


The pages are a slightly rough ecru colored paper - lovely.


This Tim Holtz stamp is perfect for the quote stamped on scrapbook paper.


The journals are a not-so-subtle ploy to encourage people to start keeping a journal.  I added interest to some pages to help avoid the dreaded blank page stress.   I purposely left plenty of room for writing and gluing in stuff.   

I made the label stickers by making a master board on a sheet of labels.  A bit of paint, some stamping and some doodling .  The magic happens when you lift off the label and get a slice of artsy goodness. I used a circle punch on some.  


These circles were so much fun to make!


Stamps from one of Shiela's famous packages.


A couple of sea-inspired  pages with white embossing.


Love this wide Cavallini washi tape.


I added a small pocket at the back with  extra strips of washi tape on freezer paper to encourage people to stick things in the journal.

Making these journals was so much fun.  (I'll share some of the others later).   It was fun to rummage through my stuff and make discoveries about things I forgot I had.     This kind of minimalist embellishing is a stress-free way to let the creative mojo rip.  And thanks to my friend for this lovely journal.

Friday, December 12, 2014

A Few Quick Tags


No, not like this one.  One year I made all the Tim Holtz 12 Tags of Christmas- the kind with 47 steps, 102 art supplies (at least 75% of those things you don't have).  And that would cause fatal harm to anyone who threw the tag away on Wrapping Paper Mountain.  I never actually put any of them on a package to avoid the fatal-harm part.

I just finished a pile of very quick tags, the kind that are made to go on gifts and (gasp), even be tossed without sending me into mourning.  

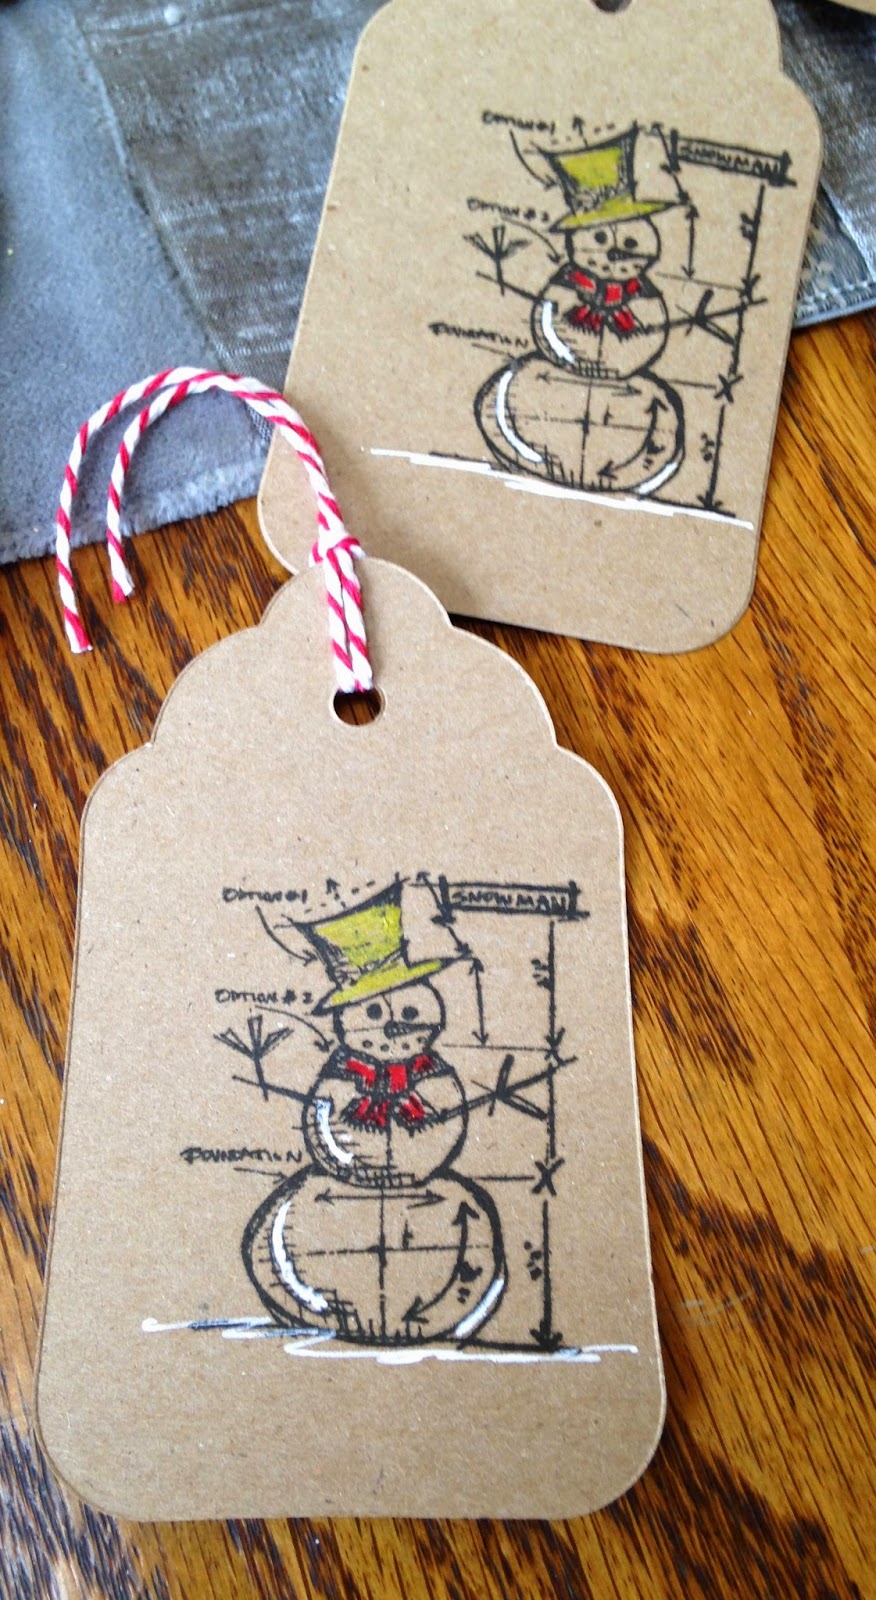
I cut out the card stock tags with a Sizzix die  - it has three different size tags.  Then some simple stamping, white pen highlights, Stickles stars,  butcher twine ties and done!


I love these Tim Holtz stamps and the look of white pen highlights .  My go-to white pen is a Sakura Gel pen because the ink flows easily and is very opaque.


I love this Iced Pine Distress Ink .  It's a soft dark sage, less bold than Pine or many other greens.  


These were inspired by some I saw on Diana Trout's blog.  How could I resist Washi tape trees?  She has a very detailed tutorial, but basically you lay strips of Washi on a piece of paper (I used printer paper) and then cut out tree shapes and glue them onto the tags.  The paper backing holds the strips together  and stabilizes the tape, so don't remove it before gluing.


Keep the strips of tape very close together (or slightly overlapping) so none of the background paper peeks through.


Diana recommends cutting a template and tracing around it to get the tree shapes, so that's what I did.  Honestly,  I'd eliminate that step and just free - hand cut the triangles if I make these again.  We're not going for geometric perfection here!  ( And yes, the Trader Joe's Reduced Guilt mac and cheese is  yummy, but really, the reduced quilt is all about portion-control - they aren't fooling me).


I used tags I had in my stash; some had been dragged through extra ink from other projects, but most were just plain.

Each tree got a little trunk and some pen doodling to give them something to stand on .  Some got Stickles and some stamped stars.

Now I guess if you could also cut out varying widths of Washi tape and stick the tape directly on the tag, making a tree shape and  forgoing the laying down of the strips and cutting out the tree shapes.   That seems like way too much precise cutting for me. Or, I've seen some trees on Pinterest made with torn strips of tape.  But you do know what Washi means?  It's Japanese for "doesn't stick".   Just kidding!!  But really, since Washi is designed to be reposition-able,  I  wouldn't count on tiny little strips staying put.  Better go with Diana's method.


Quick, easy, no new supplies, Washi tape AND no one needs to die?  Perfect.

Friday, August 1, 2014

Quick Notebook Upgrade


And that means I need lots of notebooks for all those lists.  I found these notebooks at Michael's - 3 for $2.00.  Who could pass up this deal - not moi!  The books are just the right size ( 5.5 x 4 inches)  to slip into a pocket or purse for those grocery store or Tarjay lists.  Of course these books are OK just as they are, but I thought I could make them even better.  See that stash of washi tape in the back?  I know it is a ridiculous amount of tape; probably I shouldn't tell you that I just had to buy three more rolls today.


I decided to tape the edge of each page to add some color and interest.   This was an easy project - -no measuring, no color plan, just tear, stick and clip.


Here's how I did it - tear off a strip slightly longer than the page.  Stick it down along the edge, leaving enough to fold over and stick down to the back of the page.   I have some pretty narrow tape (3/8 inch) and found that this technique works best with tape at least 1/2 inch wide.  The narrower tape is harder to position so you have bough left to fold over - not impossible, but not the easiest.   Tear, stick, fold over and repeat until you've taped every page.   


Here is my book with all the pages taped.  Now about those tape tails.  Since the cover and pages of these books have rounded corners, I decided to round each page edge.   I cut the tails even with the top and bottom of each page and then used a corner punch to round the edge.


Here are some of the pages with the edges taped and corners rounded.


This is what the book looks like with all its pretty taped pages.

Now about those covers.  

I love these Dina Wakley Squiggly Bird stamps!  So cheery, so happy, so fun.   I used a piece of artist paper from an old Somerset Studio magazine for a background.  I stamped the birdie on light blue paper and added a script stamp, cut it out and glued it to the background.  The sentiment came from a magazine.


This little card fell out of a used book and he was too cute to throw away.   I rubbed on some Distress Ink and added some bling.


The sentiment came with the scribbly bird stamps.  I used a piece of scrap paper with paint and inks leftover from other projects and doodled around the edges.


This is a perfect TV-watching project- quick and easy and no gluing.   Happy list-making!

Normal Title Italic

Follow Me on Pinterest

LinkWithin

Related Posts Plugin for WordPress, Blogger...
 
SITE DESIGN BY DESIGNER BLOGS