Monday, November 28, 2011

Tomato Tower Trees

Boston Daughter has joined the addicted-to-Pinterest and found a picture of  porch pot Christmas trees made with tomato towers.  After Thanksgiving, we made a pair for the front door.


In sunny 60 degree weather and fortified with some amended eggnog, we gathered the rest of our supplies: glue gun, pot, rope, tomato tower, spray paint, duct tape, weights, twine and artificial garlands. 


We wanted our trees to look expensive, but not actually be expensive!  So we used 2 plastic pots we saved from some garden shop purchase and hot-glued on a piece of plastic rope to add texture and a touch o'class.   Spray with some gold paint picked up at a tag sale, and our cheapo pots look pretty spiffy!

Next, get the towers ready. For making trees, we'll be using the towers upside down - the circular ringed top becomes the bottom.   Bend the wires at the narrow end together and secure with duct tape.  We hid the silver color by wrapping it with florist tape. 

Then the fun starts - wrapping with garlands.  We needed more garlands than we anticipated, so best to buy extras and return the ones you don't need.  In order to make the trees nice and full, we used 6 -seven  9 ft. garlands.  We snagged them at Michael's Black Friday madness for $1.99 each.  

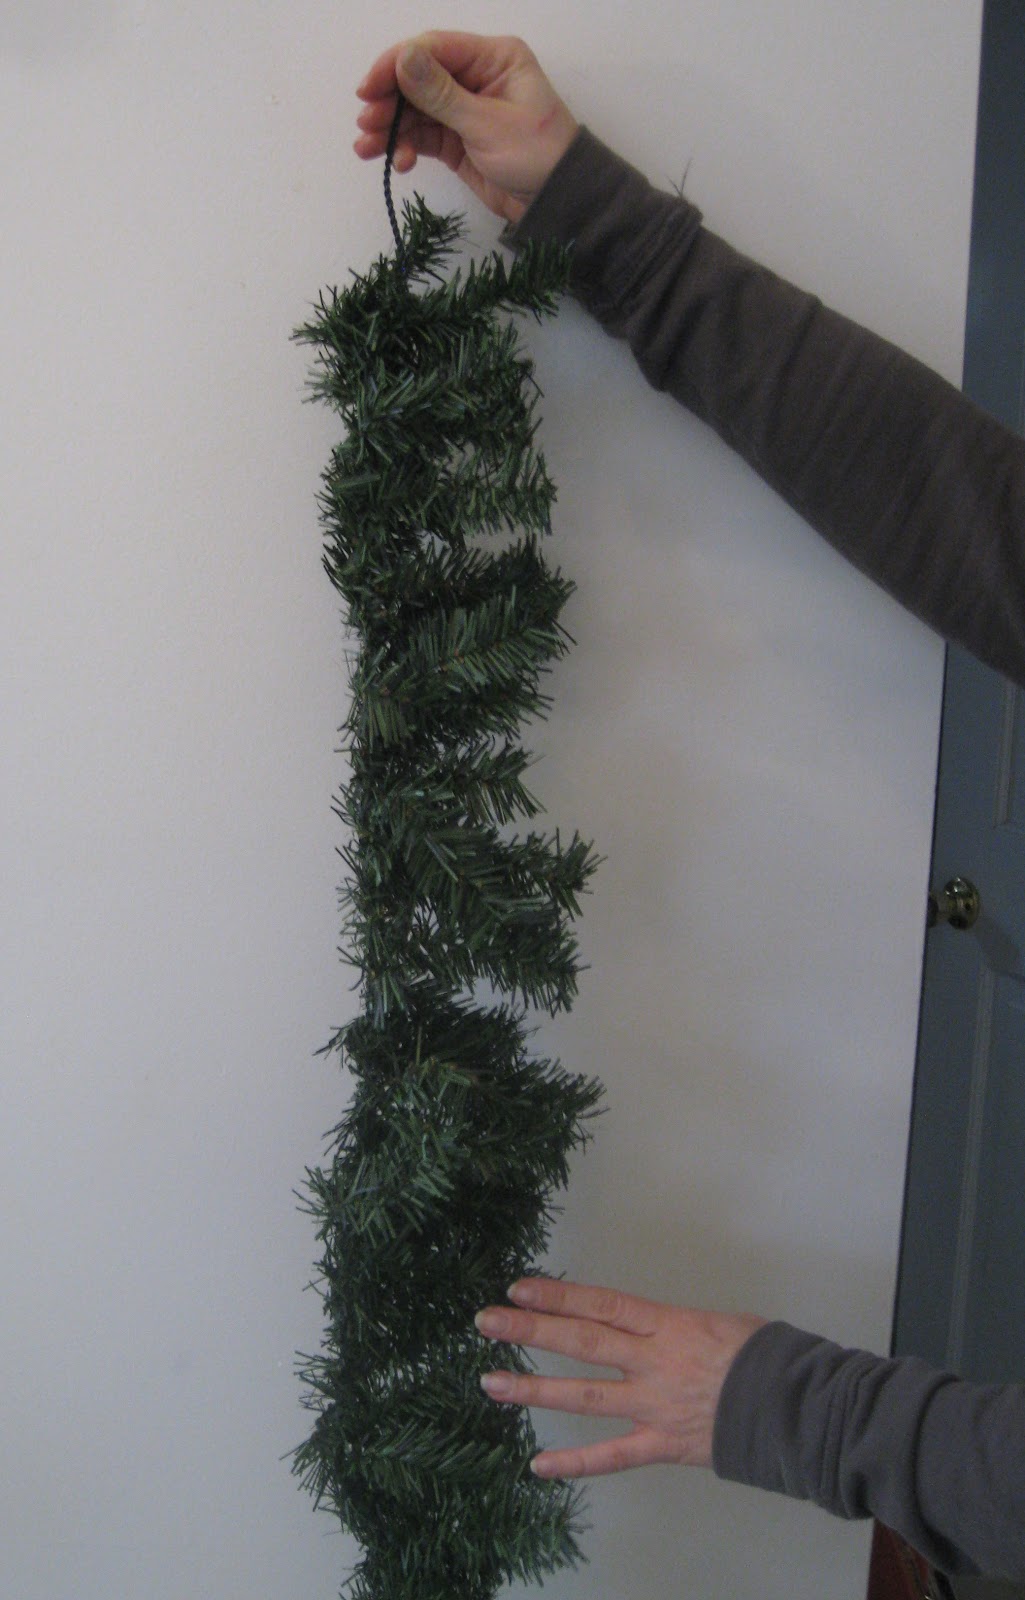
Start by straightening out the garland, and then pulling out each branch so the garland is nice and full.  Then push it all to one side so when you wrap the tower all the bushiness of the garland will be on the outside of the tower.  Your prepared garland will look something like this:


Starting at the top of the tree, secure one end of the garland to the tip of your "tree" form and wrap securely around the wire form.  We twisted the wire branches around the form every few  inches to keep the garland from sliding down.  Here's the tree, partially wrapped and beginning to look like a tree already!  Continue wrapping, securing the garland as you wind it  all the way down.  Then stand back, find any bare spots and fluff out the garland until all the bare spots are filled and the tree is nice and full.


Turns out our pots were a bit narrow, so we couldn't jam the bottom of the tower into the pot.  We rigged up a base ( the old cookie rack seen above) to help secure the tree to the pot.  If your pot is wider, you'll be able to just jam the base into it.

We added some weights to our pot so the trees wouldn't blow away.  You could use sand, rocks or whatever - we used some weights.  Because our tree base was just sitting on the top of the pot, we threaded  twine through the holes in the weights and then threaded the twine through the tree base so the tree was tied directly to the weights.  Let me know if you think of an easier way !


Once the trees were secured to the pots, we added some pine cones that we got for  37 cents at Michael's! We split the cones apart, then made some stems for the individual cones by twisting on some thin florist wires.  Place the cones where you want, adjust as needed, then wrap the wire around the garlands to secure.


Add some twinkly white lights we already had on hand and our tomato tower trees are complete!  Here's a closer look:


At less than $25.00 per tree we now have a dressed up front door for the holidays.

Saturday, November 19, 2011

The Stair DIY - The Sanding (Almost as scary as The Shining!)

 Carpet gone - check.  Now for sanding.  Here's the starting point:


My plan is to paint the stairs, but because the stairs are heavily varnished I'm concerned about making sure the paint will stick.  I don't need to sand off all the varnish, but at least scrub it up enough to give the paint something to grip.   Armed with my trusty little mouse sander, glasses and a face mask, let the sanding commence!


This was very slow-going - my poor little mouse wasn't built for such a big job!  Time to drag out the small circular sander which worked much better on larger areas.  One complaint - the little bag that's supposed to trap the dust is really mostly decorative!


Welcome to the East Coast Dust Bowl.   It is unbelievable how far the dust travels and how it clings to everything.  Once the stairs are done,  I'm going to be doing some serious dusting!


It took several passes to get through the layers of varnish and at this point, things were definitely looking pretty shabby!


Sanding the spindles was a bear!   I tried hand-sanding them, but since I wanted to finish the stairs this decade, I needed a faster way.  Then I remembered my mouse sander had a small attachment that fit between the spindles.  It still took hours, but it saved my hands and did a much better job.

Just in case the sanding wasn't enough (and because I live to complexify every project), I wiped down every square inch of stairs with a chemical sander.  This is really a weak version of a stripper, so I wore gloves.  There wasn't much odor, but I opened the windows for extra ventilation.   I'm sure the chemical sander  wouldn't be enough on its own, even though the label makes it sound like it would.  I just wanted some extra gripping power! It dried to a whitish finish which can be painted over.


Next step - filling a bazillion holes.  I know you're giddy with anticipation! 

Wednesday, November 16, 2011

Coastal Wreath

OK, so I'm supposed to be painting the stairs, but I'm finding all sorts of very important projects distractions.   I was inspired by a bittersweet and rose hip wreath from Design Sponge and took a ride up the coast yesterday to find supplies.  I so love roadside gardening!  The coast is beautiful in the fall - golden marshes, yellow rose leaves with big red rose hips and lots, lots lots of bittersweet.  I know bittersweet is considered a bad-boy, being terrible invasive and crowding out native trees and shrubs, but it's so dang pretty!

Here's my harvest:  rose branches with bright red hips , spindle that California Daughter spotted when she was home last year, some fluffy bush branches (technical name!), bittersweet, and milk weed pods.   I gave the pods a light spray of white paint so they would show up better but still look relatively natural..


Tied everybody together with twine and then a frayed bow made from an old fabric remnant.  Love my door embellishment!  With a change of ribbon and maybe some green or red branches added in later, this will work until spring.


Are you a roadside forager?


Monday, November 14, 2011

My Big Fat Scary DIY Project - The Stairs!

There was one more big project on my list for the downstairs - redoing the staircase.  Now I ask you, who puts white carpeting on stairs??  Clearly people who like vacuuming and  steaming carpeting lots more than I.  Oh, and those would also be people who don't carry bowls of steaming lattes upstairs.

The first problem with this project was The Captain.  He gets all weirded out by the path of disaster that comes with any home-improvement project.  I knew that if I brought up ripping up the carpeting and painting the stairway he would have gone to the crazy place.  He loves the end result, but not the ripped up, everything is out of place, paint and tools strewn all over part.  Kids and friends were in on my plan, but sworn to secrecy.  My plan was to get to the point of no return - carpeting ripped out- before he got home from work.  I believe in the saying "It's better to beg for forgiveness than to ask for permission"!

So here are the stairs in all their dingy glory:


I have a few stairs, then a landing, then the full flight up to the second floor, plus the railing that goes all along the upstairs hall.   Because the stairs aren't completely carpeted, I knew the treads were in pretty good shape (although dinged up and covered with multiple coats of heavy varnish).  What I didn't know was what was under the carpeted landing - finished floor boards or trash?  As you can see, the stair way it totally open to the living areas - both up and down,  guaranteeing a major dust bowl once the sanding began.

Off to the Google for researching other DIY stair projects.  Wow, there are some seriously talented women doing great stair renovations and blogging about it.  Check out Thrifty Decor Chick for great details about her stair reno. Look at the amazing job done at Southern Hospitality - she ripped up carpeting and found rough-cut wood stairs, all kinds of gaposis issues and ended up with a stairway that will knock your socks off!  I decided that if she could do this fantastic reno, I should be able to paint my stairs!   These blogs have lots of practical info so I had a pretty good idea of what I needed to do:
  • Rip up old carpet and all the nails and staples that held it down
  • Sand varnished stairs enough so they would take some paint
  • Fill any holes in the wood (after removing carpeting, turns out there are LOTS of holes)
  • Prime
  • Paint
  • Install new runner
Sounds pretty straightforward, right?   HA!

Step 1 - Removing the old runner

I started pulling up the carpeting on the first stair, made easier because I had previously pulled up the white carpeting from the dining room (don't get me started about white carpeting in the DINING room!).  This is just brute force work, pulling the runner free of all the nails and staples - actually went pretty quickly. I suggest wearing leather gloves as those little nails are very sharp!   As the piece of runner became too large to handle, I used a carpet knife to cut it loose.  (Another benefit to this was that The Captain could hardly ask me to put it back)!

Here are the lower stairs, sans runner:


Now to remove all the nails and staples! I used a pry bar to get behind the wooden strips (full of nails) and pry them away from the treads and risers, trying not to gouge the wood as I removed them.   Then I pulled out all the staples - I found prying them up with a small screwdriver and then pulling them out with vise grips worked pretty well.  As with all projects involving the potential for flying projectiles, I wore glasses!


Repeat for landing and top stairs!

So far, so good -- treads and risers look good, carpeting off without too much trouble, and wonder of wonders, landing boards are finished pine, perfect for painting! 


 Stay tuned for next steps.

Friday, November 11, 2011

Pottery Barn- Inspired Pillows


The PB Inspiration

Love these PB sweater pillows ! Knocking off PB accessories has become somewhat of an obsession and these look pretty easy.

My knock-offs

Thrifted the sweaters - all the thrift stores have rows of sweaters, so finding some that work is easy.    I had planned to make all red ones, but I couldn't find two shades that matched. Non-matchings reds is a bridge too far for me, so I went with two off-white sweaters and one red for accent.  I like to mix up the texture, so chose three different knit patterns.

First, I washed and dried the sweaters to make sure they could take it! Mine are all cotton, but you could use wool or any blend - just follow the care instructions inside the sweater.

Then on to cutting the sweater.  I tried to place the sweater on one side seam, leaving only 3 sides to sew, but that's not crucial.  (You might not be as lazy!)  I cut around the pillow form, leaving about a half-inch for a seam allowance. Then turn the sweater inside out, so the right sides are together,


I recommend using some kind of tape to stabilize the seams.  The cut edge of sweater knit is very stretchy and some twill tape / hem binding or even some ribbon will keep the square pillow from morphing into something weird.  ( I know this because pillow # 1 "grew" as I sewed, hence the twill tape for the others)!  Pin the tape along the seam edge and sew through the tape - use about a half inch seam allowance.   Leave an opening for the pillow form - about 4-5 inches, depending on the size of your form.  My off-white ones are 16x16, the red 14x14. 

I zig-zagged the cut edges to prevent any fraying .  As you can imagine, cut sweater fabric unravels pretty easily.

Turn the pillow cover right-side out again, gently pushing the corners out from inside.  I fold the pillow form in half and slip it into the cover.  Push the form into the corners, and straighten it inside the cover - sometimes a good whack or two helps to get it settled into the cover!  Slip stitch the opening closed with matching thread.

Pillow is done, but no need to stop there!  I sewed two large brown buttons from my stash in the middle of one of the off-white ones.  On the other, I made some flowers by coiling a piece of the sweater fabric.  The other flowers are made from the ties from the packaging on a set of sheets from Anthropologie - this is why I don't throw anything away!  The posies are just slip-stitched onto the pillow.  So far, the red one is sans embellishment - think the cables are enough.

Depending on the sweater you select, there are lots of ways to finish off these pillows.  On the pillow in the center, I used the hemmed edge for the top and just did a rough pick- stitch every half inch or so to hold it together.  If you use a cardigan, you could have button trim without the hassle of adding them.  You could cut parts from different sweaters - add the button half of a cardigan to a plain color sweater.

Now if I can just figure out how to keep the cat off these !

Friday, November 4, 2011

Rant Warning !! Crime Against Nature

Supermarket floral arrangements aren't usually on the tasteful end of things, what with the plastic embellishments, garish ribbons and odd assortment of colors.  But look at what I found today:


Really?  What on earth were they thinking?  Take a perfectly good rose and turn it into this hideous specimen!   There is no pot of gold at the end of this rainbow. 

Sadly, this artificial coloring of perfectly good blossoms isn't limited to tacky supermarket bouquets. Bona fide horticulturists have jumped on the trend.  While I admit I don't "get" orchids, this one is just freaky:


Take a perfectly acceptable white orchid, add blue dye, and voila, spawn of the devil is born.  But look on the bright side - the fine print warns us not to expect blue flowers in new blossoms.

Remember floral fiddler-arounders, just because you can, doesn't mean you should!!  Enough said.


Normal Title Italic

Follow Me on Pinterest

LinkWithin

Related Posts Plugin for WordPress, Blogger...
 
SITE DESIGN BY DESIGNER BLOGS