Showing posts with label Christmas. Show all posts

Sunday, November 20, 2016

Christmas Tags


Last week The Captain asked me if I was making tags for the kids before  Christmas so they could use them this year.   DUH - I usually make tags and put some in their stockings, but obviously the tags are too late for the current season.    I do love it that The Captain is paying attention to my obsessions and is even cheering them on!

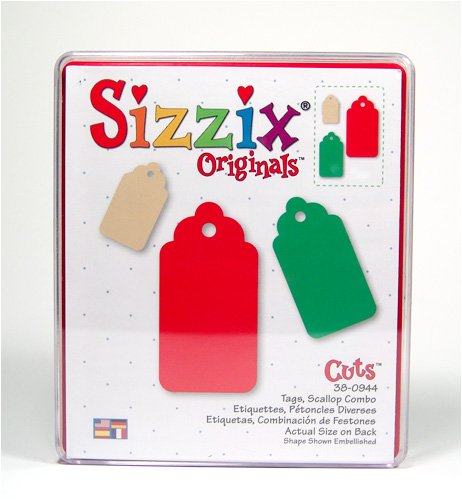
So - tag production in full-force last week.   I used old manila folders,  craft paper and some smooth cold press paper I found at a tag sale and  cut them out with my BigShot.  using these two dies   (This is another one of those projects done only with stuff from my stash, and than scares even me.)


I like the big tag and the round one, but honestly don't need all the other bits.  I now have a baggy full of the stuff on the right!

And this one, an old Sizzix one with no added doodads.

Here are some of the tags:


Love this reindeer stamp -  a little embellishing with gel pens and my favorite white uni-ball Signo white pen.


White embossed stars and snowflakes on sheet music ,  then swiped on some Dylusions paint with a baby wipe.   I glued the tags onto the back of the sheet and cut out the tags.


Text stamped on first, then the floral swag with Stickles-highlighted berries.


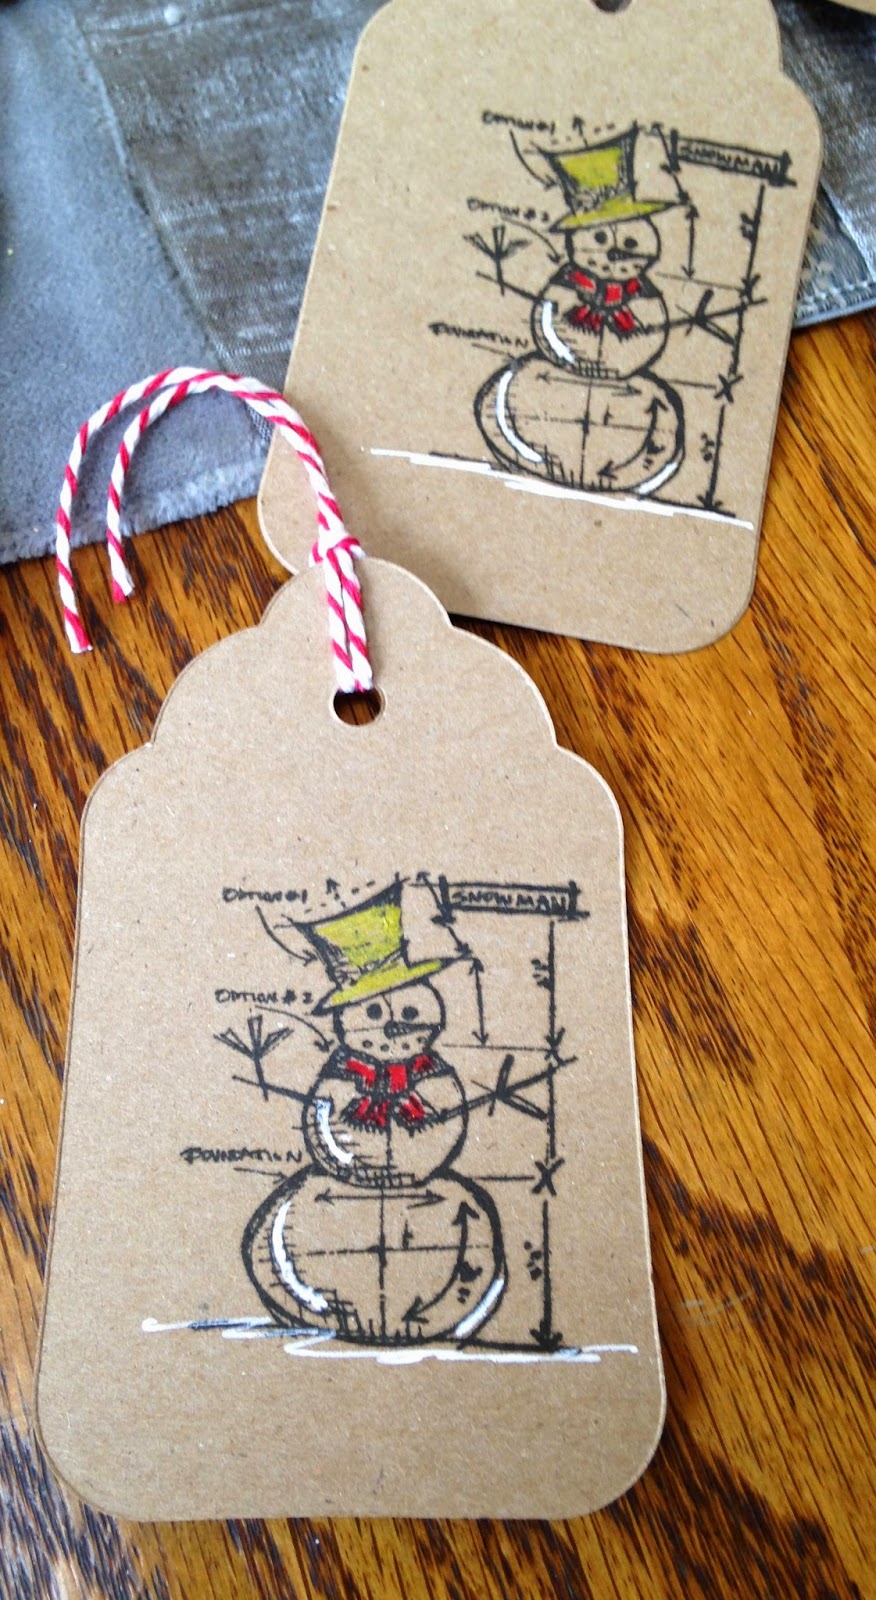
I love all the Tim Holtx architectural drawing stamps.   It's easy to add some color with pens to make the designs pop.


Trees stamped and embossed and a strip of textured white paper with glitter glue snow.


These were fun.  I've had this stamp for ages and never used it.  I think it's supposed to be a nest, but it makes a fun wreath.  Stamped and embossed with verdigris colored powder , then  Stickles and pearl pen balls.


I love white on kraft paper.   And this stamp - a $1.50 one from the bins at Michael's.


Same stamp, this time used the whole thing and added gold pearl pen dots.   Sixteen tags with eighteen dots each = 288 dots- that's a whole lotta dots!!


This is the small circle tag - I like to use parts of stamps on these little guys.


One of my favorite Christmas stamps - bird , branch and text all in one stamp.  Red Stickles for berries and a swipe of Broken China Distress Ink around the edge.


Silver- embossed snowflake and same Distress Ink swiped over the tag .

First time using gold-leafing, a gift from DC son and his wife.   It looks easier than it is !  


First step is stamping with the special sizing - it goes on white and then when ready (tacky - about 30 minutes) it turns clear.   I tried stamping with the floral swag stamp and the lines were too fine to catch the gold leaf, so went with a pencil eraser that may have been a smidge too big.


Then, carefully lay the gold leaf sheet over the stamped tag and lightly press it into the tag.  I used the brush to sort of tamp it down as well.  It was easier to lay down the whole sheet rather tear off a small piece - that way I was sure I covered the whole tag.

Then, using the same brush, I brushed away all the excess gold leaf.   That stuff can take some serious brushing - once it's attached to the tacky sizing, it stays stuck down!   You can see my little container for all the brushings - they can all be used over again in another project.  There are of course all kinds of special tools for gold leafing, but for this project  and my skill level,  my old brush worked fine.


I added some script stamping as the tags looked kinda bare without it.


I may have gone a little overboard - ended up with 206 tags !  To paraphrase  The Count from Sesame Street,  "Once I start making tags, it werry hard to stop"!

Monday, November 16, 2015

I May Have a Christmas Tag Problem


I love making tags, obviously!   I think there are a few reasons - the small size is easy, I get to use lots of stamps, and the results are always fun.   I feel like The Count from Sesame Street, "Once I start in counting  making tags, it's werrry hard to stop"!

These large tags are chalk board tags from the clearance aisle at Michaels.  I made a background spray by mixing gold liquid acrylic with a little water and topped it with a nice shimmer from Tattered Angels Glimmer Mist that doesn't show well in photos.   The bird with text stamp is one of my favorites.   I used red Stickles to make the berries pop. 


And here they are in blue.  This background is Distress Ink Peacock Feathers , then topped  again with glimmer mist.


I also used some  inexpensive tags from Ikea .   There is a mix of sizes and shapes that make for interesting tags.  There is a downside - the shiny side has a plastic coating and can make embossing tricky.  My advice is to emboss only long enough to melt the powder and aim the heat gun straight down - heating at an angle caused the plastic to melt and lift away.   Most of the time I used the uncoated side as it takes ink and embossing better.


I love white on Kraft paper.  The Kraft says shabby and the white brings on the chic!   All of these are embossed with matte white embossing powder.  It's fun to use parts of stamps on these little tags - the one on the lower right is stamped with part of a paisley stamp.


Distress Ink Iced Spruce and red Smooch Ink berries.  I've never used this stamp before and now it's one of my favorites.


More Distress ink sprayed backgrounds .  I spray, then roll over a roll of paper towels to soak up some of the excess ink - added bonus is a faint pattern left by the paper toweling, giving a hint of texture.


The snowflake tag background is a red ink spray.  


The larger tree is one of Tim Holtz architectural stamps stamped onto Christmas carol sheet music.   I love the added white gel pen snow on the twiggy tree.


Aren't these fun little guys?   Colored the snowmen's accessories with Smooch Inks and added some glitter embossed snow.


A bucket of tags - and now I need to move on to the other 72 projects on my list!

Saturday, December 20, 2014

Family Matters


It's no secret  that I struggle with kids living far away.   It's one of the things about getting older that the memo didn't cover : how to gracefully deal with the reality of grown kids having lives of their own and often having those lives in different time zones.   By gracefully,   I mean at least not sounding like the mother on the phone with Duane (Garrison Keiller) on A Prairie Home Companion:

 "And just because I'm the woman who spent 22 hours in agony giving you life doesn't mean I expect to go on playing a part in your life, Duane. No, no, no, no, no. I stepped aside a long time ago. I don't want to be like some of those mothers. Suffocating. That's what they are. Suffocating. Calling every day, pestering, pleading for attention... "

No, I don't want to be the sarcastic, guilt-trip  laying mother!  The kids are all happy adults with busy, productive lives of their own who call me and come home when they can, and I know how lucky I am.  


{Map from World Market }

This map  shows the current state of affairs, with kids spread out all over the dang country.  (Notice the not-too-subtle message that the arrows all lead home to moi).

As a measure of personal growth,  I am learning to be grateful for the times we get to spend together and  to focus on what we have, not what we're missing.  We are  learning how to make this long-distance family thing work.   We all text, call,  FaceTime, and use Facebook and Instagram.  I do not know how people managed before these wonders of the electronic age.  Imagine back in the day, waiting for weeks or months for a letter filled with old news and no pictures! Plus we are all racking up the frequent flier miles.   While flying has none of the glamor of its early days, it's  a quick way to get from here to there.    We far-flung families have lots in our favor as we try to stay connected.  


We're lucky that our kids and their partners make the effort to include us in their lives.  Another benefit?  We have expanded our family to include our kids'  in-laws  ( and they include us) , bound by the love  adoration (!) of our children and grand kids.   We've spent weekends , dinners and birthday parties together as one big family.   This is a perk definitely not mentioned in the memo!  

Which brings this discussion to the holidays and sharing.  We could  lament the changes that happen when kids grow up and  want to start new family traditions of their own and with their partner's families .  OR we could be grateful that everyone makes an effort to stay connected .  I'm going with the grateful part.

Happy Holidays!

Friday, December 12, 2014

A Few Quick Tags


No, not like this one.  One year I made all the Tim Holtz 12 Tags of Christmas- the kind with 47 steps, 102 art supplies (at least 75% of those things you don't have).  And that would cause fatal harm to anyone who threw the tag away on Wrapping Paper Mountain.  I never actually put any of them on a package to avoid the fatal-harm part.

I just finished a pile of very quick tags, the kind that are made to go on gifts and (gasp), even be tossed without sending me into mourning.  

I cut out the card stock tags with a Sizzix die  - it has three different size tags.  Then some simple stamping, white pen highlights, Stickles stars,  butcher twine ties and done!


I love these Tim Holtz stamps and the look of white pen highlights .  My go-to white pen is a Sakura Gel pen because the ink flows easily and is very opaque.


I love this Iced Pine Distress Ink .  It's a soft dark sage, less bold than Pine or many other greens.  


These were inspired by some I saw on Diana Trout's blog.  How could I resist Washi tape trees?  She has a very detailed tutorial, but basically you lay strips of Washi on a piece of paper (I used printer paper) and then cut out tree shapes and glue them onto the tags.  The paper backing holds the strips together  and stabilizes the tape, so don't remove it before gluing.


Keep the strips of tape very close together (or slightly overlapping) so none of the background paper peeks through.


Diana recommends cutting a template and tracing around it to get the tree shapes, so that's what I did.  Honestly,  I'd eliminate that step and just free - hand cut the triangles if I make these again.  We're not going for geometric perfection here!  ( And yes, the Trader Joe's Reduced Guilt mac and cheese is  yummy, but really, the reduced quilt is all about portion-control - they aren't fooling me).


I used tags I had in my stash; some had been dragged through extra ink from other projects, but most were just plain.

Each tree got a little trunk and some pen doodling to give them something to stand on .  Some got Stickles and some stamped stars.

Now I guess if you could also cut out varying widths of Washi tape and stick the tape directly on the tag, making a tree shape and  forgoing the laying down of the strips and cutting out the tree shapes.   That seems like way too much precise cutting for me. Or, I've seen some trees on Pinterest made with torn strips of tape.  But you do know what Washi means?  It's Japanese for "doesn't stick".   Just kidding!!  But really, since Washi is designed to be reposition-able,  I  wouldn't count on tiny little strips staying put.  Better go with Diana's method.


Quick, easy, no new supplies, Washi tape AND no one needs to die?  Perfect.

Sunday, November 30, 2014

DIY Sharpie Mugs **Update 12.5.14 **


We've been doing a Christmas project after Thanksgiving for the past few years.  This year we decided to try these Sharpie mugs that are all over Pinterest.

I picked up some mugs on sale at Crate and Barrel:


Essentially what we'll be doing is decorate the mugs with dots of oil-based Sharpie markers around stickers.   There are all sorts of horror stories on Pinterest about the marker just washing off.  Turns out you need to use OIL-BASED Sharpie paint markers only.  Regular Sharpie markers are not water-safe.


Then I raided my stash of alphabet stickers.  Most of the mugs we saw were made using only one letter  as an initial .  Since we are over-achievers, we decided to go full on with a word or phrase.  Plus this way we can use these as gifts for anyone.  Of course if you know who you are gifting these to, personalized mugs are wonderful.


We had the best luck with foam stickers.   There was some bleeding under the sticker with the very thin ones.  Be careful about using flocked stickers - some of the flocking stuck to the adhesive and was very hard to remove.  (We know this, of course, because we did it!).

Pretty easy technique - stick on the letter/letters you want to use, making sure the letter is securely stuck to the mug.   Then shake up you paint pen and make a few test dots of scrap paper until you get the hang of how the paint flows.   The gold and silver paint seems thinner than the other colors.

Now just start making dots around your sticker.   Make the dots close together close to the sticker, then start to spread them out a bit as you move outward.


Feel free to do whatever moves you in the dots department - pretty sure you can't go to far wrong !  We made dots on the handle on some.


Mix it up and use more than one color, like the brew mug.


Remove the stickers and see how it looks.  With all that dot-dotting, some dots go astray or leak under the sticker.  We used a small artist paint brush  dipped in nail polish remover to erase the errant dots and remove any residual adhesive front the stickers.

There is a difference of opinion about whether the mugs need to be heat cured to ensure that the dots are permanent.   So we opted for the overly cautious approach:  Double bake them.  Put the mugs on a baking tray and into a cold oven.  Heat the oven and mugs to 450 degrees for 30 mins.  Cool and repeat.  Just to be even more cautious, we added this advice:


Here's the mug-decorating crew at work.  Aren't they very focused!


Boston Daughter, Austin Daughter and moi doing the dots.


These easy-peasy mugs make great gifts, assuming we can bear to part with them.

**Update**   Breaking news:  Texas Daughter (inadvertently) put one of her mugs in the dishwasher and the dots stayed dotty!  No washing off, no color fading, so guess the double-bake  did its job.  Yippee!

Normal Title Italic

Follow Me on Pinterest

LinkWithin

Related Posts Plugin for WordPress, Blogger...
 
SITE DESIGN BY DESIGNER BLOGS