Showing posts with label renovation. Show all posts

Saturday, December 5, 2015

Waterworks Cafe - A New Favorite Breakfast Spot


Breakfast is my favorite meal to eat out, and I love finding a new place.   Today we discovered Waterworks Cafe in the  Waumbec Mill building in Manchester, New Hampshire.   It was a textile mill, built in 1900 that made rayon,  called false silk back in the day.   Manchester has renovated many of its old textile mills, turning them into upscale office buildings, shops and restaurants.   I love old buildings that get a second life once their first job is done.

The floor is fantastic - cleaned up and refinished, but with lots of old nails holes and decades of hard wear.


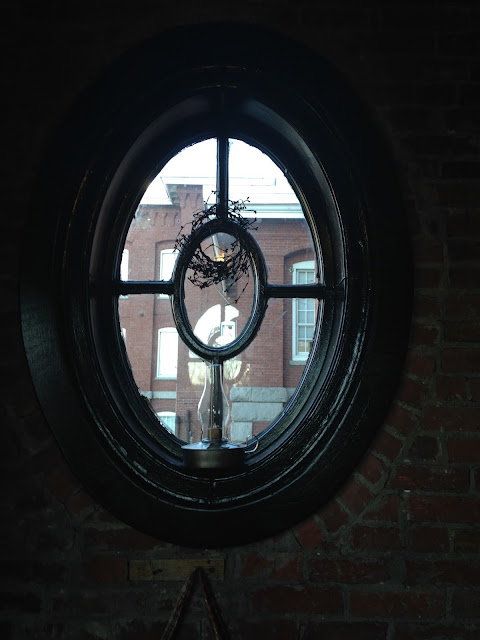
This old mill has so many great architectural features.


  But we came here for breakfast and it did not disappoint!


Love the little votive holders with Christmas decorations.


Confession - we ordered what we thought was a side of sweet potato hash, but it turned out to be an entire third breakfast.  It was so good - sautéed sweet peppers, onions, spinach with cubed sweet potatoes and a hit of bacon.   We soldiered through - it was research, remember?


Omelet with asparagus, goat cheese and mushrooms - egg beaters to save calories for that hash!   The Captain's breakfast sandwich - egg, avocado, cheese, tomato - all so yummy.  And nice coffee mugs and great coffee - perfect.


Boston ivy grows all up the walls on so many old brick buildings.  The leaves are gone at this point, but the vines are full of bright blue berries.

Like most textiles built in the 1900s, the mill was built on a river to access water for powering machines.   There are some great views of the river from the Cafe.


Great food, good views and a great old building - we'll be back.


Sunday, May 6, 2012

Kitchen Tour Ideas


We're in the thinking stage of changing out our kitchen counter tops.  By thinking, I mean that The Captain is approaching this by logical investigation and comparison shopping, and I'm freaking out.  We have lots of counter top space - 70 square feet - and I'm afraid of making a big, expensive mistake! 

He bought tickets to the Newcastle Kitchen Tour and yesterday we traipsed through some absolutely gorgeous kitchens.  Newcastle is a small town on the water and  home of  the highest per capita income in the state, making it the perfect place to check out fancy-schmancy kitchens. 

All the kitchens were professionally designed , so it was a chance to "second -hand" shop their great ideas.  Sadly, there was a "no photographs allowed" rule, so I only have a few pictures from the brochure:


I do love this all-white look - and the window shades- and the drawer pulls!


Interesting wall of cabinets without hardware - out of picture range are two large suction cup knobs that you move to whatever cupboard you need to open!

All of the houses were stunning, most were new or newly renovated.  A couple of colonial-era homes were on the tour and it was interesting to see how very old, very small kitchens were transformed and yet kept their old-world charm.

I noticed a few themes:

     *  All of the houses  except one had granite counter tops (the hold-out had soapstone). 
     *  Most houses had large islands
     *  Most had large deep, single sinks
     *  All had lots of light - either natural or artificial
     *  Window treatments were absent or minimal
     *  All had minimal clutter - counters were pretty bare
     *  Most had light colored cabinets - either light wood or painted white

We learned a couple of things - that my idea of having the stove island done in butcher block has been done and looks fantastic.  Check it out in the photo above. 

Another good idea - the off center faucet, like this one from Young House Love:


On the way home, we checked out some counter top options.  I like the idea of granite, but not the highly polished look.  The aged, "leather" finish is nice - matte with some texture:


 I also saw some Corian I liked and love the one piece sink option, plus the no-seam finish.  While it costs as much as granite (at least the color I like does), it doesn't have the instant pedigree of granite!  This is Corian Verde:


And with the Corian one-piece sink:


More searching, more looking, more investigating before taking the plunge.  Any suggestions?


Tuesday, October 4, 2011

New DIY Cabinet Knobs

Now that the kitchen has been repainted, the cabinet knobs were looking worse than ever. 

Who wouldn't just love these 80s faux-gold (that's reverting to its original silver color in spots (alchemists, take note).  I have lots of cabinets - 42 knobs' worth! White knobs on white cabinets = lots of white; clearly some color was in order.  Plus, I changed out the color of the lighting in the kitchen from gold to silver, so the fading gold on the knobs had to go.   Nice knobs are pricey- even the cheap $5.00 kind  would set me back $200!!   Since my dream is to replace the cabinets someday, I didn't want to drop serious money for place-holder  knobs. 

I've checked out some ideas online and some folks are doing some pretty creative things - check them out here and here and here.   Clearly I could do something to buff up mine.

First step:  Pop out the button. This was essential to my plan of doing two colors because I live to complexify any project!   The popping thing wasn't as easy as it sounds!  I tried prying  out the button with no luck, but soaking the knob in hot water did the trick.  Think it expanded the metal just enough to release the plastic button. ( I told you these were some high-quality hardware)!  This one ( a spare test- subject) has some chips from my attempts to dislodge it prior to heating it.

Next I scrubbed them to remove any grime.

Then some spray primer - I like Kilz best.  Word of caution - I thought perching the knobs in skewers stuck into florist foam was a good idea.  Not so much - the foam shed little bits of grit that stuck on the knobs - maybe because it was an old piece?  I had better luck perching the knobs on an old cookie rack - no sticking!


Then the buttons got a spray coat of Rust-Oleum Hammered Silver and the knob bases Rust-Oleum Hammered Black.  These hammered paints cover minor scratches and can be painted over rust.  The finish looks almost like a combination of some light glossy and slightly darker matte colors.  I like that it's not really shiny and has a slight texture to it. 


Then I sprayed on a coat of clear matte finish, although I don't know that it was really necessary.

Some of the buttons snapped back in easily, some did not, so they got glued in.

This project wasn't difficult, but I'm not going to lie, it was pretty tedious what with all those steps!  But I love my new knobs and how they've dragged my cabinets into the current decade.


Monday, May 23, 2011

Artsy Lightbulbs!

The Plumen 001

We've replaced most of our light bulbs with those ugly low-energy bulbs.  They are fine if you can't actually see the bulb, but hideous in clear-shaded lights. Seems like they didn't need to be so UGLY - maybe if the bulbs were more attractive, more people would make the switch.  People are actually hoarding the incandescent bulbs so they don't run out when the old- style bulbs will no longer be available.    Well, check out these  beauties, coming soon to a store near you!  No more excuses!


Hold the shades- these naked bulbs  are an instant art installation.


Available here soon.


A bit less artsy option is available from GE.  It's not as attractive as the Plumen, but orders of magnitude  nice than the current coil style.


We got lots of mileage out of Mr. Edison's design - high time to  embrace function with some sassy style.

Sunday, March 6, 2011

Vase Facelift


Boston daughter got this vase for me awhile ago.  I love the shape, but the blue doesn't really work anymore, so what to do but give it a new life with some paper !   I glued on various off-white pieces of torn papers - text, music, and pieces from a shopping bag.   It still needed something, so I gave it a swipe of some gold shoe  polish that I bought at the cobblers.   I didn't plan to actually polish shoes with it, but couldn't resist the old gold color.  Here is the new version of my vase:


Remember those flowers we made out of tissues in grammar school?  I'd forgotten about them until I recently made some out of tissue paper for my granddaughter's 3rd birthday.  Then I remembered that I had seen some out here in blog land made of sewing patterns.  I dug out an old pattern and made these flowers.   Next time I'll iron the paper so it's a bit neater  and maybe try some Distress Ink on the edges.  

PS - Love the new, improved Blogger picture upload, but still fooling around with text and layout!!

Thursday, February 10, 2011

The Power of Paint and Vintage Knobs


We've had this large piece of furniture for a long time, changing it as our tastes and needs changed. I can't find a good picture of the original - it was honey- colored pine with a row of small drawers ( like 6 inches deep) along the back edge - very colonial. Several years ago Carpenter Son removed the small drawers, stripped the top and painted the dresser off white. I added some funky twig hardware and the dresser moved from colonial to cottage - yippee!. Lately it's been in our family room, holding an antique, ginormous TV.
We stepped into the 21st century and got a flat screen TV for Christmas. Normal people would just go out and buy something new to hold the TV, but I always think "what do we have that might work"? I'm not a fan of "entertainment centers", or at least the ones that don't require a second mortgage, so decided to give the dresser a new look.


I re-sanded the top and put on a couple of new coats of Butcher's wax. The wax doesn't protect like polyurethane, but I like its soft shine. Sage green on the base and white on the drawers give it a bit more punch. I used the vintage knobs I found at a salvage store. I love the look of a dresser re-do I saw in a Stamptington magazine - they used all mis -matched knobs, but since this dresser has lots of knobs, decided to use a combination of matching/mis-matched knobs so it wouldn't be too busy.

I learned two things doing this project. I have painted lots of furniture and like the matte look of flat paint, but not how impossible it is to clean. Well, news to me, there is a flat enamel finish - who knew; not me, obviously!! Love it - flat finish, but a hard surface so finger prints wipe off.

My California daughter told me about this great blog, Centsational Girl. She describes conditioners to add to paint that extend drying time and reduce visible brush strokes. Floetrol is the one for latex paint; Panetrol for oil based paint. This is made for me - my Carpenter Son used to say it looked like I painted with a broom! I'm somewhat better that that now, but next time I'm going to try the conditioner.

Tuesday, February 1, 2011

Rescued Treasures

One of my favorite haunts is an architectural salvage. Northeast Salvage is full of treasures - from tiny vintage hardware fittings to huge fireplace surrounds. There are hundreds of doors and window frames of all kinds. One time there was the whole inside of a church - pews, sacristy, altar, and even a confessional booth. Shoppers in search of absolution for excessive retail expenses could duck in after making their purchases! I love wandering around, soaking in all the history (and dust!). It is a joy to see such exquisite craftsmanship and to know it's not ending up in some landfill. It is also dangerous - my mind was just whirling with ideas for making things.


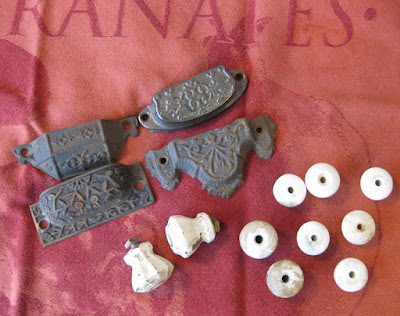
Today I was on a mission to find replacement knobs for a dresser I'm refinishing. I recently came across a dresser re-do that featured mismatched knobs - light bulb moment! I needed fourteen knobs and decided to do some matching/mismatching. The small white porcelain ones will go on the top drawers and the two flower -shaped ones on the side doors.

These beauties will be on lower drawers. There were boxes and boxes of these -all kinds of shapes and designs. They did, of course, have some nice plain ones, but who could resist the fancy ones? I'll be scrubbing them up a bit and may swipe on / wipe off some white paint to highlight the decorations and make them work with the rest of the dresser.


Word of caution - this is not thrift-store shopping! Apparently salvaging doo-dads is expensive. While I had spent a good ten minutes earlier in the day trying to pry the cap off a jar of face cream so I could get the last few pennies worth of cream out, I happily dropped some serious money for these treasures. I rationalized it by reminding myself I was re- purposing the dresser and not buying a new one, so the pricey knobs were really a bargain!

Tuesday, March 30, 2010

A New Studio Space- Part D for "Declared Done"!


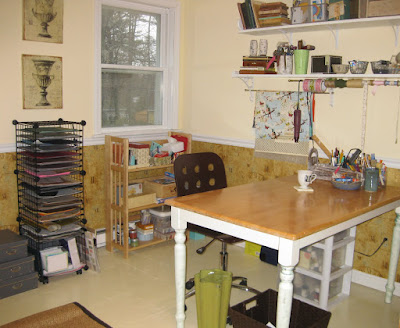
I'm so pleased with my new studio space! It's so roomy, lots of storage space and just plain lovely. Some of my treasures have come out of hiding , most of my stuff is much better organized, and the space feels full of possibilities. I wanted to get some pictures posted as the room will never be this clear again !

In no particular order (as if that wasn't obvious!), some of the spots I like. These are some muslin ribbons I made, wound onto vintage bobbins. Cigar boxes hold some unmounted stamps.
I'm making my shelves earn their space.

The Captain got this old window frame for me awhile ago, and I've been waiting to find the perfect spot. I've had the little white house dillie for ages, have nearly donated it many times, and never had a good place or idea for it. Not sure if you can see it, but it's full of embossing powders. God, I had no idea I had so many ! The drawers in the white unit are full of stamps...the woman at the Post Office asked me yesterday how many stamps I have ( I love her because she always ooohs and ahhhs over my stamped packages). I don't' exactly know how many, but I do the the number would frighten normal people!


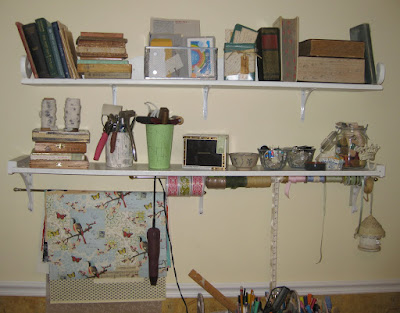
I love my shelves. The bottom one was part of an old bed, the top one was in the boiler room, begging for a nicer home. A couple of coats of white paint, some brackets, and instant display and storage. I threaded curtain rods through the bottom brackets - one for hanging large sheets of paper, the other for ribbons. Should have taken down the heat gun for the picture - while it's handy there, not so attractive in the picture! I also didn't realize how many books I have - these are just for text backgrounds and embellishing. I probably have enough for several life times.


The paper storage stack isn't all that attractive, but so much better than my previous storage - all on one big box, so I couldn't find anything and everything was getting bent or torn. I like having all the colors separated - so I can find exactly what I need without pitching a nuttie hunting for it.

Now, I'm going to start making stuff!

Sunday, March 28, 2010

Celebration!

Whew, think we're finally over the Nastiest. Bug. Ever. To celebrate, we went to a local farmers' market over the weekend. In keeping with our New Year's resolutions, we're trying to eat more locally grown food, so we were delighted to find local winter farmers' markets. We are regulars at the summer ones, but just found out about the winter offerings. This weekend the market was at a greenhouse and it was mobbed - police directing traffic, cars parked all up and down the road - crazy!

There isn't much for vegetables yet, of course, but I did snag some lovely little beet greens. There were fish vendors and several small farmers selling organic, humanely raised meat. We've cut way back on our carnivorous tendencies, so even though "happy" meat is more expensive, we're probably spending less than we were on the industrial stuff. The Captain found some huge pork chops and ground beef for his nights to cook.
These lovely duck eggs were our fun find. They are so amazing -- blue-green or brown speckled and BIG - how could we pass up these beauties? So this morning, I made scrambled duck eggs - a first for me. I couldn't bear to break the shells, so recruited The Captain's help in blowing out the eggs. A careful poke or two with a skewer, a bit of back and forth to break the yoke, some huffing and puffing and the eggs plopped out. ( Easy for me to say, The Captain did all the work). These eggs are really thick, almost the consistency of pudding. Tasty, tasty and so pretty - that's a lot of goodness from a little duck! We rounded out our feast with toast with maple butter from Dean's Sugar House in Charlemont, Mass - JD makes the best-ever maple butter!

The shells found a new home in a great little nest - I know ducks don't live in little nests in trees, but they look so darn cute! The nest is in my new studio -stay tuned for the final installment on the reno!On the way out, I bought a couple packets of seeds and some pussy willows - spring is here and we are over the plague - life is good!

Normal Title Italic

Follow Me on Pinterest

LinkWithin

Related Posts Plugin for WordPress, Blogger...
 
SITE DESIGN BY DESIGNER BLOGS