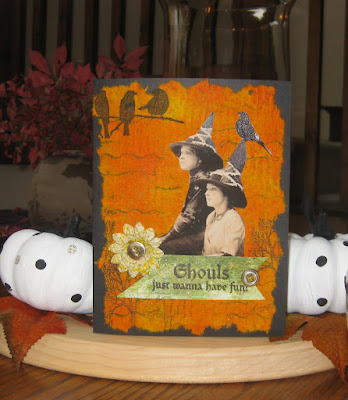
I've never made Halloween cards before. My Halloween festivities are usually limited to performing quality control on several bags of chocolates before the big day. I need to ensure that the 1 or 2 trick or treaters who come to our house have safe candy.
We've been studying Bernie Berlin's ATC Workshop book at NGS and I made some inked paper towel backgrounds that seemed right for something spooky. On this card, I used some of the paper towel inked with dye inks for the background and a great skeleton image from The Vintage Moth . I added a stamped mannequin dress and a yarn belt. Even a skeleton ghoul needs a fancy bag and some red toenail polish!
The pumpkins are ones I mentioned before, featured on Jenny Doh's blog. I used some cheap plastic pumpkins from Michael's so they wouldn't go all squishy. I mixed some gesso with while paint to make sure it would stick to the plastic. The little one on the left has some dots made with black acrylic paint and a pencil eraser stamp. I used a paper punch to punch little circles from a dictionary page. The one on the right has a sewing pattern glued to the bottom, and a free-form scallop trim of adhesive backed-fabric. A bit of rick-rack and some measuring tape complete the sewing theme. These were so much fun to make and they are so darn cute.
 This one's a bit busy, but I love this stamp from River City Rubberworks. I edged the background with the top braches of a tree stamp.
These ghouls needed some legs and a bit of bling.

The ghoul stamp was in the dollar bin at Michael's - it had little pumpkins on the edges, but I liked it better without them. Ever since my good friend Shiela (yes, that's how she spells it) told me about trimming rubber stamps, I took it one step further and have been hacking off pieces of them I don't like.
Happy Halloween!


Love your Halloween cards.
ReplyDelete