Showing posts with label stamps. Show all posts

Monday, April 24, 2017

Wooden Stamp Storage - Banish the Block


We're downsizing and my massive stamp collection takes up lots of room.  Don't get me wrong,  I love my wood mounted stamps, but it's either find a way to store them so they take up less real estate or get rid of them.  Option 2 is crazy-talk.

The solution came in one of my Facebook art groups,  Maremi's Creative Cafe,  posted by Suzy Jenkins.  She nukes the stamps to peel them off their wooden base.  I've tried prying stamps off before without heating and got chunks of foam left behind.  The heating makes  the whole shebang lift off nicely.

I selected big background stamps as having the most space-saving potential.  Plus, having these stamps unmounted makes them easier to use in backgrounds.  I rarely use these as whole stamps, and it's a bear to stamp just parts when the stamp is on a block.

Here are the fancy tools I used:


Nuke the stamp on full-power for one minute.  Carefully remove with pot-holder - the wood block gets mighty hot,  be careful.  I found it easier and safer to put the stamp, face up, on a plate and put the plate in the microwave.  It's easier to lift the plate out than the hot stamp.

Once the stamp was heated, I slid an old butterknife under between the wood and the foam backing.  The stamps all peeled off easily and none were damaged in the process.

I wanted some way to identify my unmounted stamps.  Some of the wooden blocks had that plastic coating with the image printed on it.   I tried lifting it off the wooden block and sticking it to the foam backing, but found it was really easier to stamp the image on some transparencies from my stash.  I stamped them with StazOn, then cut out and stuck it on the back of the stamp.  The foam stays sticky, so no problem adhering the transparency or the original label.  You could use the plastic from unmounted sheets or packaging - you'll want something to cover up the sticky back.


Now here's the pay-off.  Before, with my can for size comparison:


 After:


 Cooking stamps in the microwave - who knew?  Planning on cooking lots more,  Thanks, Suzy !


Sunday, January 1, 2017

The Year of the Doodle Finale


This book by Dawn deVries Sokul may just be the best $12.00 I've ever spent.    I met my goal - do something for every day - doodle,  collage, lettering .   Is every one a masterpiece?   Hardly.   Some were so bad I had to totally cover the mess and start over, others rated only a "meh", and a few that turned out better than expected.  I stretched my doodling skills, and realized I need lots more work on lettering.

The binding on this book is nothing short of amazing:


My Year of the Doodle is on the right and started out the same size as Art Doodle Love.  I have collaged, painted, added button edges and generally stressed the binding which is still holding together despite unspeakable odds.


This  over-stuffed book makes me happy whenever I look at its wavy pages, tabs, threads and buttons.


A few last pages to share:


This is an amazing mandala stamp.  The stamp has straight edges, so I continued the design to soften the edges.


I was surprised how many ruler tapes and stickers I found in my stash ! The bird and most of the background on the right is a napkin.


I love using old envelopes.


I've been decluttering my stamp stash and found this cute house stamp I'd forgotten I had.


This was fun - I used a little green tomato to stamp these apples.


December was easy  - used up lots of Christmas bits and pieces from my stash.   I drew the tree with different color Distress Stickles.


The festive birds were salvaged from a card stamped by my friend, Shiela.


Background is from Doodle in French by Anna Corbin - drew on the dress form and added fabric stickers and some rub-ons.  Audrey is the crowning touch!

I'll miss my daily challenge , but luckily I have a brandie-new, pristine Art Doodle Love to start.


Sunday, November 20, 2016

Christmas Tags


Last week The Captain asked me if I was making tags for the kids before  Christmas so they could use them this year.   DUH - I usually make tags and put some in their stockings, but obviously the tags are too late for the current season.    I do love it that The Captain is paying attention to my obsessions and is even cheering them on!

So - tag production in full-force last week.   I used old manila folders,  craft paper and some smooth cold press paper I found at a tag sale and  cut them out with my BigShot.  using these two dies   (This is another one of those projects done only with stuff from my stash, and than scares even me.)


I like the big tag and the round one, but honestly don't need all the other bits.  I now have a baggy full of the stuff on the right!

And this one, an old Sizzix one with no added doodads.

Here are some of the tags:


Love this reindeer stamp -  a little embellishing with gel pens and my favorite white uni-ball Signo white pen.


White embossed stars and snowflakes on sheet music ,  then swiped on some Dylusions paint with a baby wipe.   I glued the tags onto the back of the sheet and cut out the tags.


Text stamped on first, then the floral swag with Stickles-highlighted berries.


I love all the Tim Holtx architectural drawing stamps.   It's easy to add some color with pens to make the designs pop.


Trees stamped and embossed and a strip of textured white paper with glitter glue snow.


These were fun.  I've had this stamp for ages and never used it.  I think it's supposed to be a nest, but it makes a fun wreath.  Stamped and embossed with verdigris colored powder , then  Stickles and pearl pen balls.


I love white on kraft paper.   And this stamp - a $1.50 one from the bins at Michael's.


Same stamp, this time used the whole thing and added gold pearl pen dots.   Sixteen tags with eighteen dots each = 288 dots- that's a whole lotta dots!!


This is the small circle tag - I like to use parts of stamps on these little guys.


One of my favorite Christmas stamps - bird , branch and text all in one stamp.  Red Stickles for berries and a swipe of Broken China Distress Ink around the edge.


Silver- embossed snowflake and same Distress Ink swiped over the tag .

First time using gold-leafing, a gift from DC son and his wife.   It looks easier than it is !  


First step is stamping with the special sizing - it goes on white and then when ready (tacky - about 30 minutes) it turns clear.   I tried stamping with the floral swag stamp and the lines were too fine to catch the gold leaf, so went with a pencil eraser that may have been a smidge too big.


Then, carefully lay the gold leaf sheet over the stamped tag and lightly press it into the tag.  I used the brush to sort of tamp it down as well.  It was easier to lay down the whole sheet rather tear off a small piece - that way I was sure I covered the whole tag.

Then, using the same brush, I brushed away all the excess gold leaf.   That stuff can take some serious brushing - once it's attached to the tacky sizing, it stays stuck down!   You can see my little container for all the brushings - they can all be used over again in another project.  There are of course all kinds of special tools for gold leafing, but for this project  and my skill level,  my old brush worked fine.


I added some script stamping as the tags looked kinda bare without it.


I may have gone a little overboard - ended up with 206 tags !  To paraphrase  The Count from Sesame Street,  "Once I start making tags, it werry hard to stop"!

Monday, November 7, 2016

Distress Ink Leaves (AKA Pre-Election Therapy)

{here}


So there are two issues looming large in my brain:
#1     It is 4:10 p.m. and already getting dark
#2     Full-on pre-election panic.   I do not want to move to Canada where it's even colder and darker. But as Texas Daughter reminds me, we would be a shoo-in given The Captain's genealogy research.   Our people in Quebec should welcome us with open arms, right?

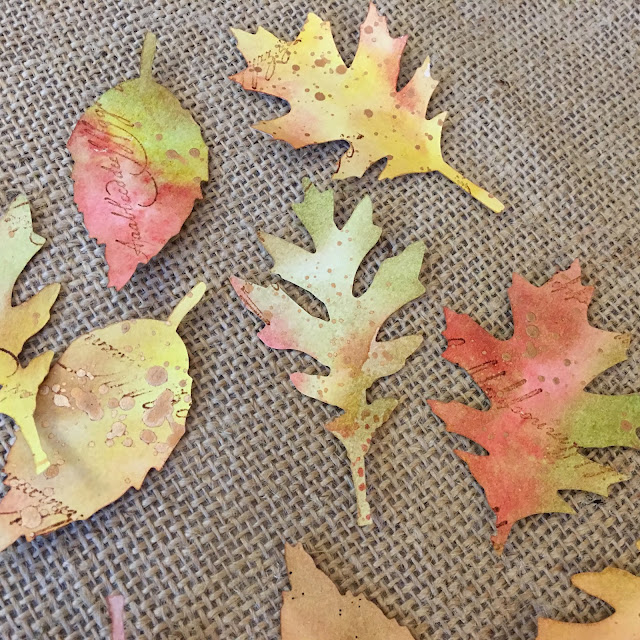
What to do in the meantime but make something.    I saw these fall leaves done by Tim Holtz .   I'm not great at following directions, so I made a few changes.

He made a custom ink pad out of fall Distress Ink colors - too much for my frazzled brain, so I just swiped ink onto a craft mat, then spritzed with water.  I used these colors:


Then I laid a piece of white yardstick down onto the inked craft mat.   Don't swipe the paper through the ink or you'll get mud - just lay the paper down and then lift it off with no smearing.  I gave the papers a quick blast with the heat gun to dry the ink.


I did follow Tim's technique of splattering with some diluted gold Distress paint.   I love the fan brush for this technique - better paint dispersal learned the hard way, so now I wear an apron when using it!

Added some more interest by stamping an old script alphabet stamp randomly over the paper before cutting out the leaves.


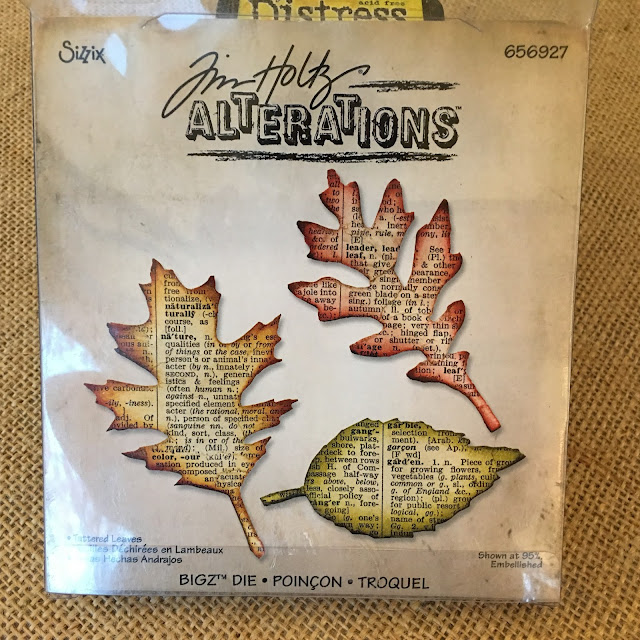
I cut out leaf shapes with this Sizzix die.


Some areas didn't get enough color, so I used the same ink colors and blended on some more with the blending tool.


I have a plan for these lovelies, but right now am just basking in their colors and forgetting for a moment the craziness swirling around us.

Normal Title Italic

Follow Me on Pinterest

LinkWithin

Related Posts Plugin for WordPress, Blogger...
 
SITE DESIGN BY DESIGNER BLOGS