Showing posts with label tags. Show all posts

Wednesday, March 1, 2017

Dendritic Mono-printing


In keeping with my plan to watch more art videos and less news, I came across a video by Cat Hand on dendritic mono-printing, which sounds way more complicated than it is.  The technique is basically this:   spread a fairly thick layer of acrylic paint between two sheets of glass,  smoosh  the glass together, then carefully lift the top piece of glass off and  place a piece of paper over the painted surfaces to lift prints.  Cat has also done this using sheets of acrylic instead of glass with similar results.


Two colors of blue acrylic paint spread onto glass.  I used glass from cheap photo frames.   If you've done Gelli printing, you'll notice that this technique uses a pretty thick layer of paint, not the brayered thin layer for Gelli printing.


Here is another color combo, sandwiched between two pieces of glass.  I only had these two different sizes, and it was an emergency to try this out, so made do with what I had.  Once the top piece of glass is on, press pretty hard all over the surface to make sure you have good contact contact with the paint .  You will be able to see the pattern begin to emerge in the paint  - so cool.

The hardest part of this is lifting off the top piece of glass without smearing the paint.  You can just see the metal palette blade I used to pry up the top - still a bit tricky.

As soon as you lift off the top piece of glass, you can see the dendritic pattern in the paint.   This branching pattern is everywhere in nature - tree branches, leaf veins, river deltas, neurons, and blood vessels. There's a whole lot of math involved in how this happens that I don't pretend to understand!

So now you have two pieces of glass with patterned paint.  Place paper (I used card stock and some French dictionary pages) on the paint and lightly rub over it to make sure you have good contact.  If you rub too hard, you'll obliterate the pattern.   I was able to get two good prints off each piece of glass. Carefully lift off the paper to see the magic:


Like Gelli printing, it's hard to stop once you start.  Each piece is unique - I love the combination of pattern and white space.   In some I see leaves, others look like corral - so much fun!  These will make great backgrounds.   I used one to make a simple sympathy card:


And couldn't let the paint left on the glass go to waste, so I swiped some tags through for playing with later.


And just like that, another obsession is born.

Sunday, November 20, 2016

Christmas Tags


Last week The Captain asked me if I was making tags for the kids before  Christmas so they could use them this year.   DUH - I usually make tags and put some in their stockings, but obviously the tags are too late for the current season.    I do love it that The Captain is paying attention to my obsessions and is even cheering them on!

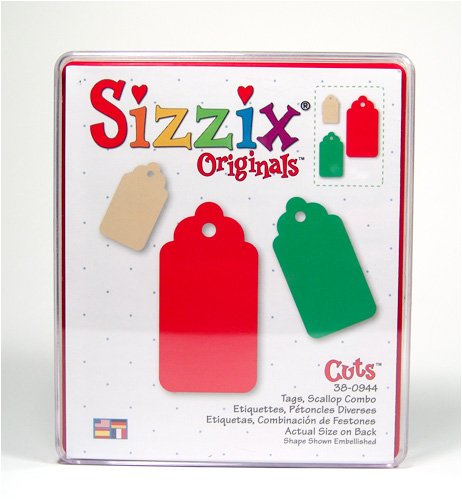
So - tag production in full-force last week.   I used old manila folders,  craft paper and some smooth cold press paper I found at a tag sale and  cut them out with my BigShot.  using these two dies   (This is another one of those projects done only with stuff from my stash, and than scares even me.)


I like the big tag and the round one, but honestly don't need all the other bits.  I now have a baggy full of the stuff on the right!

And this one, an old Sizzix one with no added doodads.

Here are some of the tags:


Love this reindeer stamp -  a little embellishing with gel pens and my favorite white uni-ball Signo white pen.


White embossed stars and snowflakes on sheet music ,  then swiped on some Dylusions paint with a baby wipe.   I glued the tags onto the back of the sheet and cut out the tags.


Text stamped on first, then the floral swag with Stickles-highlighted berries.


I love all the Tim Holtx architectural drawing stamps.   It's easy to add some color with pens to make the designs pop.


Trees stamped and embossed and a strip of textured white paper with glitter glue snow.


These were fun.  I've had this stamp for ages and never used it.  I think it's supposed to be a nest, but it makes a fun wreath.  Stamped and embossed with verdigris colored powder , then  Stickles and pearl pen balls.


I love white on kraft paper.   And this stamp - a $1.50 one from the bins at Michael's.


Same stamp, this time used the whole thing and added gold pearl pen dots.   Sixteen tags with eighteen dots each = 288 dots- that's a whole lotta dots!!


This is the small circle tag - I like to use parts of stamps on these little guys.


One of my favorite Christmas stamps - bird , branch and text all in one stamp.  Red Stickles for berries and a swipe of Broken China Distress Ink around the edge.


Silver- embossed snowflake and same Distress Ink swiped over the tag .

First time using gold-leafing, a gift from DC son and his wife.   It looks easier than it is !  


First step is stamping with the special sizing - it goes on white and then when ready (tacky - about 30 minutes) it turns clear.   I tried stamping with the floral swag stamp and the lines were too fine to catch the gold leaf, so went with a pencil eraser that may have been a smidge too big.


Then, carefully lay the gold leaf sheet over the stamped tag and lightly press it into the tag.  I used the brush to sort of tamp it down as well.  It was easier to lay down the whole sheet rather tear off a small piece - that way I was sure I covered the whole tag.

Then, using the same brush, I brushed away all the excess gold leaf.   That stuff can take some serious brushing - once it's attached to the tacky sizing, it stays stuck down!   You can see my little container for all the brushings - they can all be used over again in another project.  There are of course all kinds of special tools for gold leafing, but for this project  and my skill level,  my old brush worked fine.


I added some script stamping as the tags looked kinda bare without it.


I may have gone a little overboard - ended up with 206 tags !  To paraphrase  The Count from Sesame Street,  "Once I start making tags, it werry hard to stop"!

Friday, October 21, 2016

Chamil Garden Stamps


My annual birthday art supply buying spree had to be changed since my favorite store closed!   Fortunately I saw these stamps that janethecrazy posted on  Instagram .   (Check her out - she does great  travel journals) .  

The detailed doodle stamps are a brand made in Japan - Chamil Garden. I  tracked some down on Nico Neco Zakkaya's  Etsy shop where she sells Japanese stationery, stamps, washi tape and other goodies.   It was such a treat to get a package from her store!


First, the envelope all decorated with tape and little stamped designs.


And inside, another envelope:


Look at this fantastic black glassine envelope with a hand-written label, decorated hole reinforcer and washi tape.


I carefully peeled off the washi tape as I opened the envelope and look what fell out -


a little plastic stick wrapped with extra washi tape !    I love the extra time put into all the details that make things special .


Back to the stamps - check out these beauties!


I just finished a major purge of my stamp collection,  but who could resist these?   The stamps are small - the tallish ones less than an  inch wide and the fat ones about about and inch and a half wide.    They look like they will be great as journal accents, but I had to try them out on some quick tags.


I rubbed  Distress inks on the tags ,  stamped on the designs, then added  some Tim Holtz phrase stickers and ric - rac ties.    I love the detailing in the stamps and the mix of images and text.

Isn't the Internet amazing ? A woman in New Hampshire finds stamps made in Japan and buys them from a seller in New York !

Monday, November 16, 2015

I May Have a Christmas Tag Problem


I love making tags, obviously!   I think there are a few reasons - the small size is easy, I get to use lots of stamps, and the results are always fun.   I feel like The Count from Sesame Street, "Once I start in counting  making tags, it's werrry hard to stop"!

These large tags are chalk board tags from the clearance aisle at Michaels.  I made a background spray by mixing gold liquid acrylic with a little water and topped it with a nice shimmer from Tattered Angels Glimmer Mist that doesn't show well in photos.   The bird with text stamp is one of my favorites.   I used red Stickles to make the berries pop. 


And here they are in blue.  This background is Distress Ink Peacock Feathers , then topped  again with glimmer mist.


I also used some  inexpensive tags from Ikea .   There is a mix of sizes and shapes that make for interesting tags.  There is a downside - the shiny side has a plastic coating and can make embossing tricky.  My advice is to emboss only long enough to melt the powder and aim the heat gun straight down - heating at an angle caused the plastic to melt and lift away.   Most of the time I used the uncoated side as it takes ink and embossing better.


I love white on Kraft paper.  The Kraft says shabby and the white brings on the chic!   All of these are embossed with matte white embossing powder.  It's fun to use parts of stamps on these little tags - the one on the lower right is stamped with part of a paisley stamp.


Distress Ink Iced Spruce and red Smooch Ink berries.  I've never used this stamp before and now it's one of my favorites.


More Distress ink sprayed backgrounds .  I spray, then roll over a roll of paper towels to soak up some of the excess ink - added bonus is a faint pattern left by the paper toweling, giving a hint of texture.


The snowflake tag background is a red ink spray.  


The larger tree is one of Tim Holtz architectural stamps stamped onto Christmas carol sheet music.   I love the added white gel pen snow on the twiggy tree.


Aren't these fun little guys?   Colored the snowmen's accessories with Smooch Inks and added some glitter embossed snow.


A bucket of tags - and now I need to move on to the other 72 projects on my list!

Normal Title Italic

Follow Me on Pinterest

LinkWithin

Related Posts Plugin for WordPress, Blogger...
 
SITE DESIGN BY DESIGNER BLOGS